Quick start guide
Whatever business you’d like to start you can run it on Vev. And best of all, it's free of charge and it’s up and running in under a minute.
Over 200 business ideas are ready to go from our homepage. In this article, we’ll help you set up your page in no time!
Customize your page
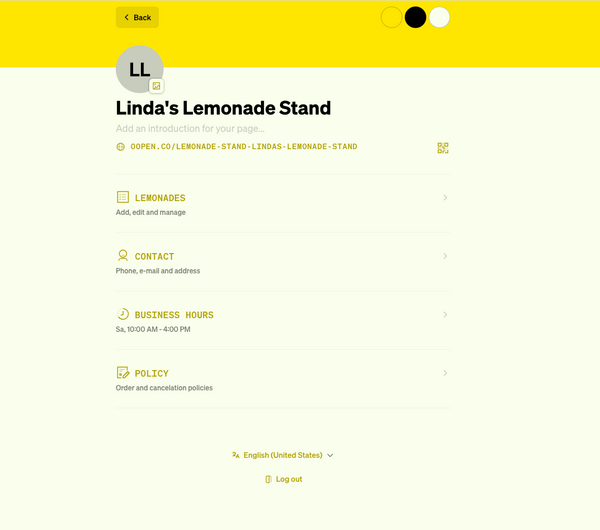
After you sign up, you immediately land on your dashboard. In the upper left corner, tap on your initials. If you have one already, upload a logo to replace those initials. Otherwise, we’ll keep using the initials for now. On this page, you can also write a brief description of your business.
Think of this as the bio of your Instagram page. It’s a great way to tell people what you are doing and what makes your business unique.
In the top right corner, you see three colored dots. Here you can change the color scheme of your page. Your entire dashboard, ordering page, and every email will be sent out in these colors.
Feel free to play around with it, and make sure that it represents your brand well.
Change your offering
Now that the basics are all set, let’s customize your offering. In this example, we are running a lemonade stand. The first item on your dashboard is called Lemonades. Tap it to open up the menu editor. Every page comes with a default menu.
As you can see, there’s a title for your menu or price list. Each item belongs to a category. You can create as many categories as you want and also change the order.
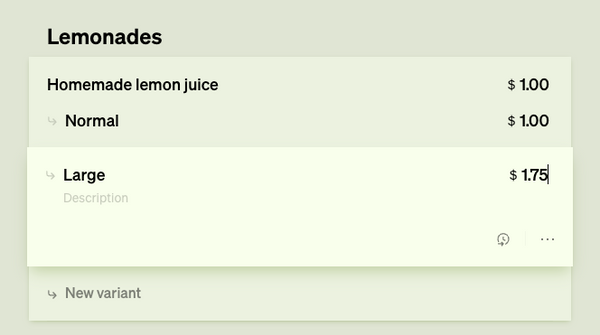
Tap on any of the preloaded items to change its title, price, or description. You can also create variants. In this example, Linda’s Lemonade Stand will also offer a large lemon juice. To do this, Linda created a ‘normal’ variant that is priced at $1 and added a large for $1.75.
Keep in mind that there is no save button, so everything that you change, add, or delete is automatically updated.
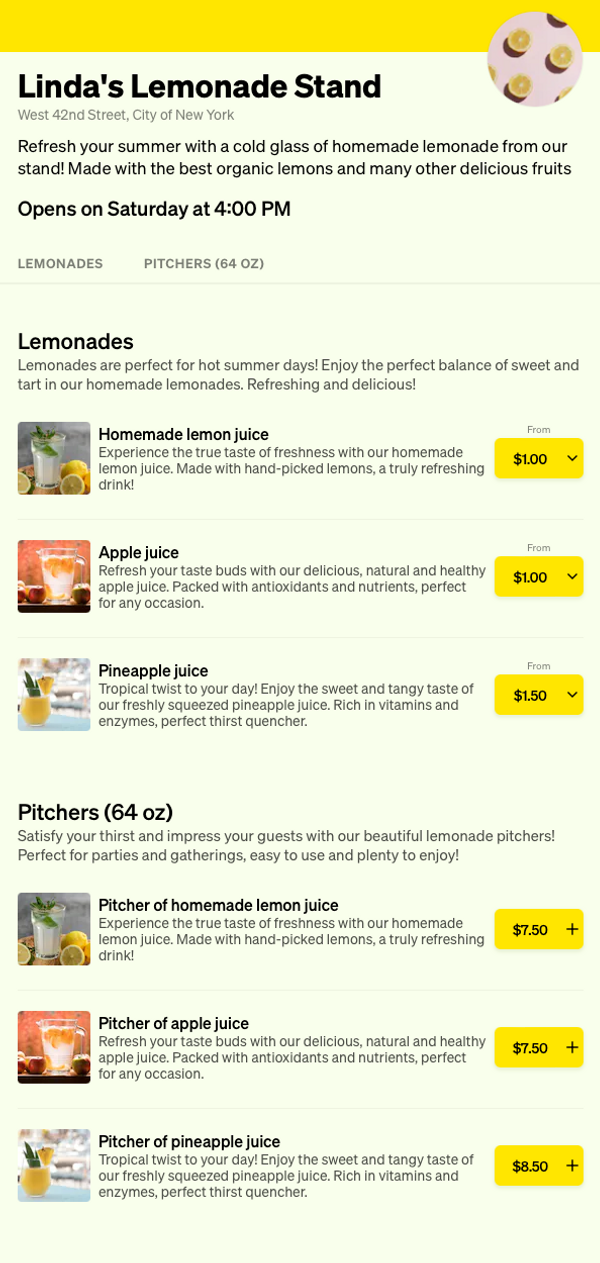
You can also upload an image with each menu item. Simply click on the main item, and on the right side you can upload a photo. Tap the empty image box to upload the photo. The image is always shown in a square box.
For this lemonade stand, we’ll also create a category with pitchers. One by one we add the products. You can write a brief description about this category and we set the price to $7.50 - $8.50 for these pitchers. No variants this time. We’ll upload the same photo to make it look extra nice. And voila, your menu is coming about!
Business hours
By default, each page will have a set of suggested opening hours. Click 'Business hours' from your dashboard to review this set.
In this example, the lemonade stand is open on Saturdays from 10am till 4pm. Click 'Regular Hours' to start editing. You can alter the hours for just the Saturday, click additional days that these opening hours are applicable for, or create a second set of hours for the same day.
This is useful in case your business is open from 10am till 4pm, and reopens (let's say) later in the day from 6pm till 10pm.
You can create as many sets of opening hours as needed.
Breaks and smart breaks
Who doesn't need a break from time to time. Click Breaks to set this up. Select the days you'd like the break to apply the break to.
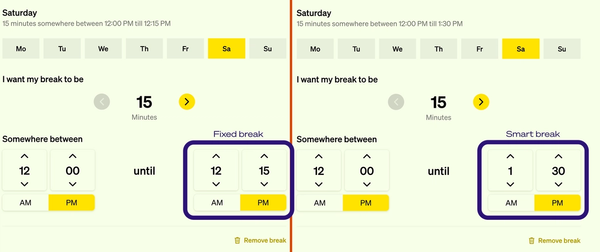
You can set up a fixed break or a smart break. To add a fixed break, you select the duration of your break. In this example we'll say 15 minutes and we'll plan it between 12:00 pm and 12:15 pm.
In that case, customers can't schedule appointments or orders during that window.
Alternatively, you can set up a smart break. You still define the duration, but you'll widen the window for the break to take place in. For example, between 12:00 pm and 1:30 pm.
Based on customer demand, the break will stay flexible to offer your customers more flexibility. As soon as the last slot is taken, your break will be locked in somewhere in the defined period. Rest assured, a break is never skipped unless you remove it yourself.
You can take as many (fixed or smart) breaks as you want, and you can even combine fixed and smart breaks throughout the day.
Exceptions
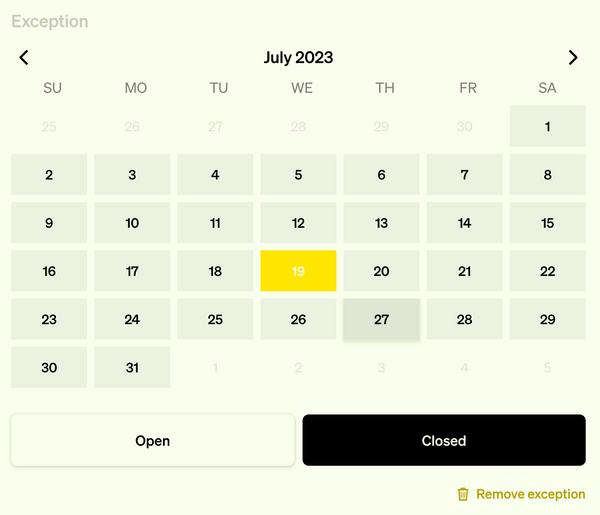
Exceptions work two ways. You can add dates that your business is closed (for example, over New Year's), or be opened in addition to the regular hours. For example, leading up to a holiday.
Click Add exception and select the day (or days) for which this exception is applicable. Next, select Open or Closed. If you select Open, you can add the hours for this exception. Remember that these hours overwrite your regular hours for that day or period.
Policy
Every store can set its own order and cancellation policy. Click Policy from the overview of the dashboard.
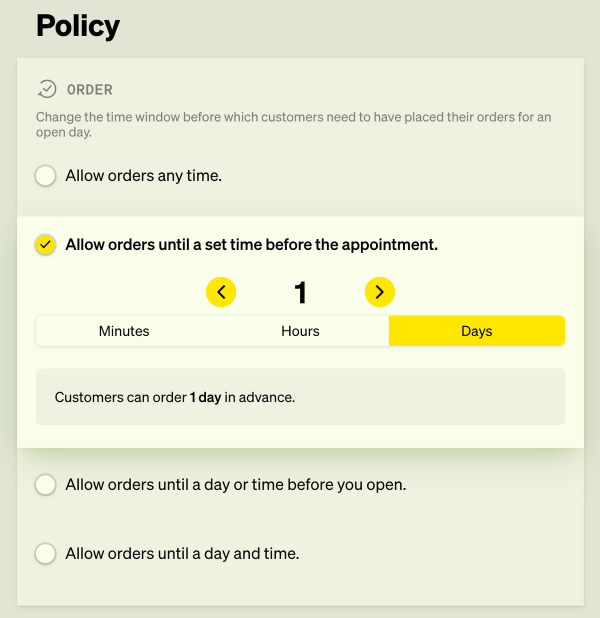
Order policy
Select Order to review the default policy. In this example, orders can be placed until 1 day before their scheduled pick up. Meaning that if the store is only open on Saturdays, an order should be in by Friday.
You can also change this to a matter of hours or even minutes.
There's more flexibility in this window than there might appear to be. Let's review all options.
Allow orders at any time - The most straightforward of them all. The most flexible option for customers if they want something right away.
Allow orders until a set time before the appointment - The order must be in before a specific deadline ahead of pick up/delivery. This could be an actual minute, up to various days in advance. Giving you a bit more time to prepare the order.
Allow orders until a day or time before you open - Similar to the above option, but with the difference that the cut-off moment is based on your opening hours. Ruling out same-day orders and locks your schedule either minutes, hours, or days before you actually have to fulfill the orders for that day.
Allow orders until a day and time - A precise cut-off date and time, either at one moment in the week or multiple. Example 1: all orders, regardless of pick up/delivery in the week, need to be placed on Mondays before 10 am. Or you select two or more days with a cut-off, for example, at noon.
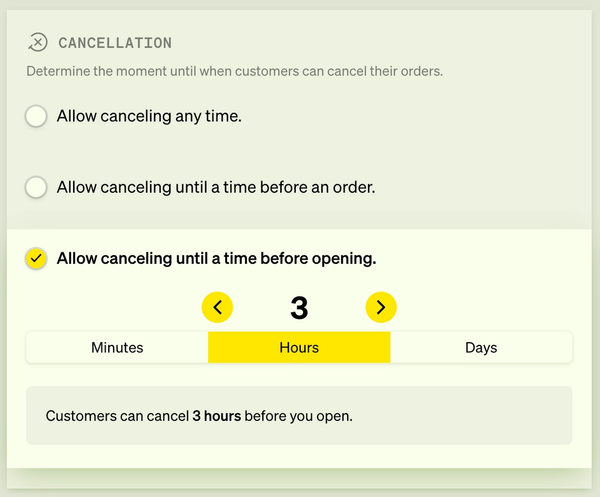
Cancellations
There's also granularity when it comes to your cancellation policy. You have 3 options.
Allow canceling any time - Your customers can cancel at any point, even if the order should take place in a minute from now.
Allow canceling until a time before an order - A defined number of minutes, hours, or days ahead of when the order will take place. For example, 3 hours before the scheduled pick-up.
Allow canceling until a time before opening - Similar to the above, but the cancellation deadline is based on when your business opens that day. For example, the order will take place at 3 pm, but your store opens at 11 am. The defined number of minutes, hours, or days is based on you opening at 11 am.
Add manual orders
You can also add orders yourself to your Vev page. A helpful feature for when orders in person or over the phone come in. In the upper right corner, you'll find the + icon. As soon as you click it, you'll see your entire menu.
Add the items, and add the details of your customer. New customers must be added once; regulars will show up in the list as soon as you start typing their name. Select the date and time, and hit 'Place order.'
Your customer will automatically receive an email confirmation.
Bonus feature: after two appointments from the same customer, Vev will auto-suggest next appointment dates and times based on the time in between the previous appointments. Over time the suggested date will get more accurate!

Ready to get started?
Use these tips to make the most out of Vev and get started quickly. If you haven't created your own Vev link yet, click here to kickstart your business.